Crafting with paper bags is a wonderful way to spark your child’s creativity while keeping them entertained for hours. Not only are paper bags easily accessible and affordable, but they can also be transformed into countless fun and exciting crafts that your child will love.
This blog post will explore paper bag crafts perfect for kids of all ages. These crafts are fun to make and help improve your child’s fine motor skills, hand-eye coordination, and creativity.
So gather your supplies and get ready to explore the world of paper bag crafts with your little ones. Let’s get started!
Variety Of Paper Bag Crafts To Make By Kids
Here’s a chart with the things needed for some easy paper bag crafts for kids, along with their alternatives:
Things You Need:
| Paper Bag Craft | Things Needed | Alternative Materials |
| Paper Bag Puppet | Paper bag, construction paper, scissors, glue | Markers or crayons instead of construction paper |
| Paper Bag Animal | Paper bag, construction paper, scissors, glue | Googly eyes, pom-poms, felt instead of construction paper |
| Paper Bag Princess Crown | Paper bag, paint or markers, scissors, glue | Glitter glue or stickers instead of paint |
| Paper Bag Windsock | Paper bag, streamers or tissue paper, glue, string or yarn | Ribbons or fabric scraps instead of streamers |
| Paper Bag Book Cover | Paper bag, scissors, tape or glue, decorative materials (stickers, markers, etc.) | Wrapping paper or scrapbook paper instead of a paper bag |
These are just a few examples of easy paper bag crafts for kids and their alternative materials. Encourage your child to use creativity and explore different materials to make unique paper bag crafts!
Benefits of Crafting with Paper Bags
Paper bag crafts are great for kids, adults, and seniors! Let’s look at some of the benefits of crafting with paper bags:
They are inexpensive. Paper bags are readily available and very inexpensive. You can buy them in bulk at most stores, save them from your shopping trips, and recycle them later.
They are easy to use and manipulate into different shapes. Since they are made of paper, they are much easier to work with than other materials, such as wood or metal, because they don’t require special tools or skills to manipulate them into different shapes. This makes them ideal for kids and adults who may be uncomfortable working with more complex materials like wood or metal.
They can be used for many things besides just crafts. Paper bags can also be used for storing items like office supplies, food products, etc., so you don’t need to buy new storage containers whenever you run out of space in your cupboards or drawers!
You can also add stamping on your paper bag craft which may be learned by clicking here.
Supplies Needed for Paper Bag Crafts
Here’s a chart of supplies needed for paper bag crafts:
| Supply | Description |
| Paper bags | Brown or white paper bags in various sizes |
| Construction paper | Assorted colors for cutting and decorating |
| Scissors | A good pair of scissors for cutting and shaping paper |
| Glue | Liquid or stick glue for adhering paper and decorations |
| Markers or crayons | To color and decorate paper bag crafts |
| Paint | For painting and adding color to paper bag crafts |
| Googly eyes | These can be used to add a fun, playful touch to paper bag crafts |
| Pom-poms | Another fun decoration option for paper bag crafts |
| Pipe cleaners | These can be used to create shapes, figures, and other decorations |
| Ribbons or yarn | For adding texture and interest to paper bag crafts |
| Tissue paper or streamers | These can be used to create frills, decorations, and more |
| Stickers | A simple way to add fun and personality to paper bag crafts |
These are some supplies you might need for paper bag crafts. The specific supplies you need will depend on the craft you’re making and your child’s creativity and imagination.
How To Make Easy Paper Bag Crafts For Kids?
Paper bag crafts are a fun and easy way to decorate your home or office. You can do these craft projects with your kids or your own.
There are many different kinds of paper bag crafts you can make, but here are some of our favorites:
Paper Bag Flowers
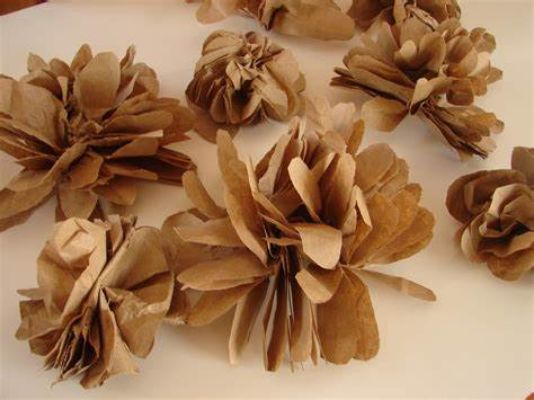
These flowers look like real blooms, but they’re made from paper bags! They’re easy to make, and you can use them in many ways!
Paper Bag Dolls
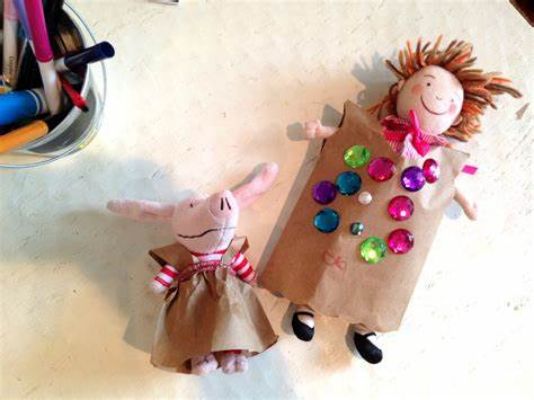
Paper bag dolls are another great way to use up old grocery bags. You can make these cute dolls as gifts for friends and family.
Paper Bag Puppets
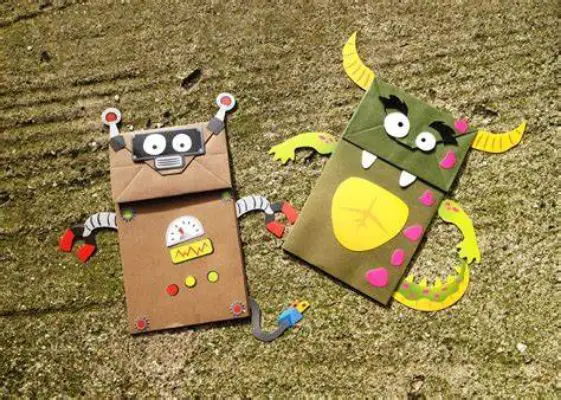
Paper bag puppets are simple to make but fun to play with! Your kids will have a blast making them for their friends or putting on shows with their new puppets.
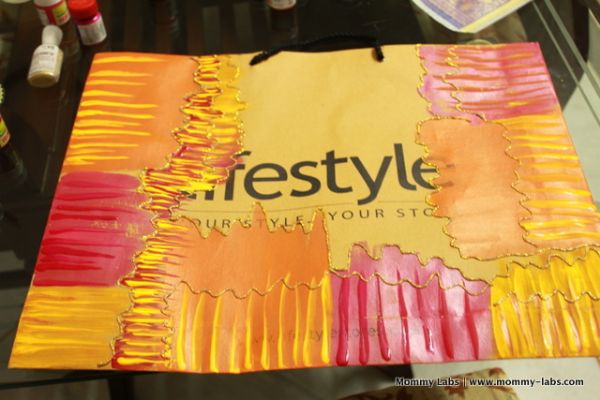
Illustrational Paper Bag Craft

Paper Bag Puppet Craft
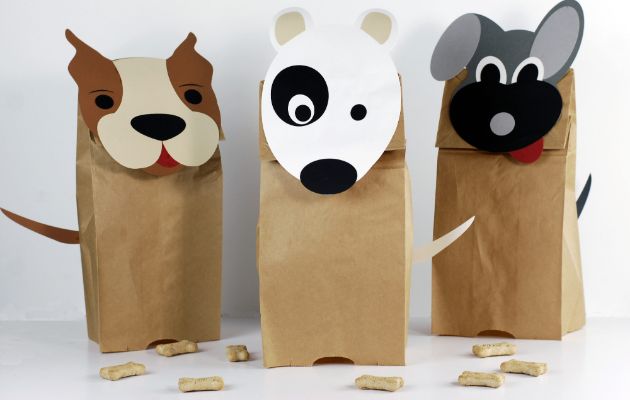
Here’s how to make a paper bag puppet craft:
Things Needed:
- Paper bag
- Construction paper
- Scissors
- Glue
- Markers or crayons
Instructions:
- Choose an animal or character for your puppet, such as a cat, dog, or monster.
- Cut out shapes from construction paper to create the features of your puppet, such as eyes, ears, nose, mouth, and whiskers.
- Use glue to attach the features to the paper bag. You can place them on the bag’s flap so that they move when the puppet’s mouth opens and closes.
- Use markers or crayons to add details and decorations to your puppet.
- Use your hand to move the paper bag flap up and down, making the puppet’s mouth open and close.
Tips:
- Encourage your child to get creative with their puppet by adding accessories, like a hat or bowtie, or even making up their character.
- For younger children, you can pre-cut the construction paper shapes to make it easier for them to assemble their puppets.
- You can use different colored paper bags and construction paper to add even more color and personality to your puppet.
- After making the puppet, encourage your child to put on a puppet show or act out a story using their new creation.
Paper Bag Animal Craft
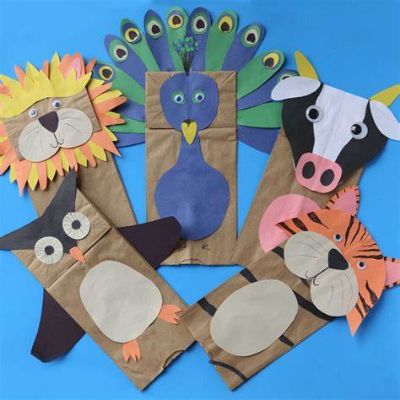
Here’s how to make a paper bag animal craft:
Things Needed:
- Paper bag
- Construction paper
- Scissors
- Glue
- Markers or crayons
Instructions:
- Choose an animal you want to make, such as a lion, elephant, or monkey.
- Cut out the shapes needed for your animal from construction paper. For example, you can cut out ears, a tail, a trunk, or legs. You can also use googly eyes or draw eyes with markers.
- Use glue to attach the construction paper shapes onto the paper bag. You can put them on the bag’s flap so that they move when you play with your animal.
- Use markers or crayons to add details, such as stripes or spots, to your animal.
- Play with your paper bag animal and have fun!
Tips:
- You can make different types of animals using different colors and shapes of construction paper. For example, you can make a pink pig with a curly tail or a green alligator with sharp teeth.
- Encourage your child to add creative touches to their paper bag animal by drawing accessories like a hat or a bowtie.
- To make it easier for younger children, you can pre-cut the shapes needed for the animal and let them assemble it.
- You can also use pom-poms, pipe cleaners, or other materials to add texture and dimension to your paper bag animal.
Paper Bag Princess Crown Craft
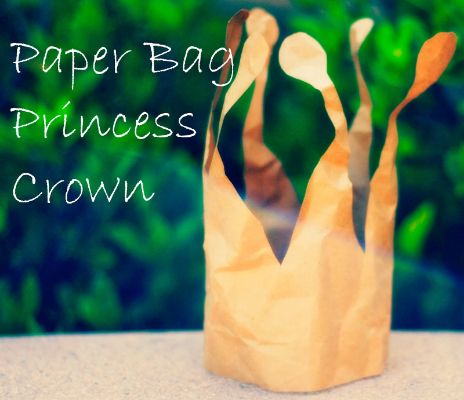
Here’s how to make a paper bag princess crown craft:
Things Needed:
- Paper bag
- Scissors
- Glue
- Paint or markers
- Decorations such as stickers, glitter, or gems
Instructions:
- Cut off the bottom of the paper bag, leaving only the rectangular top portion. Cut along one side of the rectangle to open it into a long strip of paper.
- Cut the paper strip into three equal pieces.
- Fold one of the paper pieces in half lengthwise. Cut a zigzag pattern along the folded edge to create the crown points. Unfold the paper; you should have a crown with points on top.
- Repeat step 3 with the other two paper pieces to create more crown points.
- Use paint or markers to color the crown points and the rest of the paper bag strip.
- Using glue to attach the crown points to the paper bag strip in a zigzag pattern creates a crown.
- Decorate the crown with stickers, glitter, gems, or other decorations.
Tips:
- To make the crown more durable, reinforce the paper bag strip with cardboard or craft foam before adding the crown points.
- Encourage your child to get creative with their crown by adding decorations or painting it in their favorite colors.
- You can pre-cut the paper pieces for younger children and have them color and decorate the crown.
- You can also make variations of this craft, such as a king’s crown or a superhero mask, by changing the shape and decorations of the crown points.
Paper Bag Windsock Craft
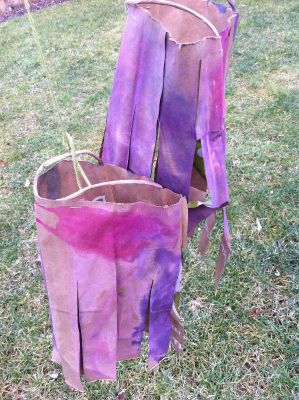
Here’s how to make a paper bag windsock craft:
Things Needed:
- Paper bag
- Scissors
- Ribbon or streamers
- Hole puncher
- Glue or tape
- Markers or paint
Instructions:
- Cut the bottom off of the paper bag so that only the rectangular top portion remains.
- Cut several strips of ribbon or streamers to your desired length. You can use one color or several colors for a more colorful windsock.
- Use the hole puncher to make several holes around the bottom of the paper bag. Space them out evenly around the edge.
- Thread the ribbon or streamers through the holes in the paper bag and tie a knot to secure them in place.
- Use markers or paint to decorate the paper bag with fun designs and patterns.
- Cut a long ribbon or string and attach it to the top of the windsock. You can use glue or tape to secure it in place.
- Hang your windsock outside and watch it blow in the breeze.
Tips:
- You can use a heavier paper bag or reinforce it with clear packing tape for a more durable windsock.
- Encourage your child to get creative with their designs using different patterns, shapes, and colors.
- You can also add decorations to the windsock, such as glitter or stickers, to make it more eye-catching.
- If you don’t have ribbons or streamers, you can use tissue paper or crepe paper for a similar effect.
Paper Bag Book Cover Craft
Here’s how to make a paper bag book cover craft:
Things Needed:
- Paper bag
- Scissors
- Ruler
- Pencil
- Tape or glue
- Decorations such as stickers, markers, or paint
Instructions:
- Start by measuring your book. Lay the book flat on the paper bag and use a ruler to measure the height and width of the book.
- Cut the paper bag to size. Use scissors to cut the paper bag down to the size of the book, adding an extra inch on each side for the flaps.
- Fold the flaps. Fold the top and bottom flaps of the paper bag over the front and back covers of the book. Crease them well.
- Cut out the corners. Cut a diagonal line from each corner of the paper bag to the end of the flap, creating a triangle-shaped flap on each side.
- Fold and tape the flaps. Fold the triangle-shaped flaps over the book’s cover and tape them down securely.
- Decorate the cover. Use markers, stickers, or paint to decorate the book’s cover as desired.
Tips:
- You can use different sizes of paper bags for larger or smaller books.
- For a more durable book cover, you can reinforce it with clear contact paper or laminating sheets.
- Encourage your child to get creative with their designs using different colors, patterns, and decorations.
- You can also use this technique to cover notebooks or journals.
Conclusion
Paper bag crafts are fun for kids to express creativity and develop skills. They’re inexpensive, eco-friendly, and promote recycling. So, next time you have a few spare paper bags, grab some scissors, glue, and markers and see what fun creations your child can create.